DIY: Replace your intel mac mini's hard disk drive
Although there are lots of tutorials and guides out there in the internets which try to guide you through the process, I found most of them are outdated (their contents applying only for PowerPC minis only, whose layout is different from intel minis) or confusing (dark pictures, etc). So after I managed to replace my mini's hard disk yesterday, and not breaking anything (in fact, I'm writing with it now!) I feel with authority enough for writing a how-to.
If you're willing to replace your mini's hard disk, I recommend you read this completely first so that you get an idea of what is needed and then decide if you're adventurous enough for doing so. Although I would say, it wasn't as difficult as I was expecting.
Tools you will need
Scratching knife, putty knife or however you call it.
You'll find them in your favourite real hardware store, in the painting area. If you don't look over 18 years they will ask you for an ID, just in case you're trying to commit crime with it or something (!!!).

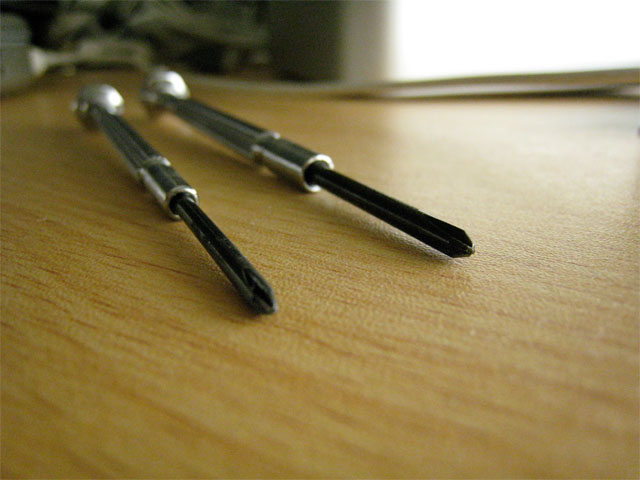
Philips screwdrivers
I just needed these two sizes. There's no need for any other exotic format. This is how philips screwdrivers look; they are just the usual plus sign-shaped screwdrivers (+):
An external hard drive for backing up your data
I have read of people using their ipods in disk mode, but mine is just too small for holding even my songs (it's a 4gb ipod mini) so I used an external USB disk with plenty of space.
A new hard drive
You'll need a Serial ATA 2.5" 5400rpm drive. Normal ATA drives won't work, basically because the connectors are absolutely incompatible. I chose a 160 GB disk.
Before opening the case
We need to duplicate the current contents in the hard disk, so that we can restore all into the new disk later. I used SuperDuper! because I heard it was faster, but I think you can also use MacOSX's Disk Utility. (I haven't tried the latter for duplicating). Some people have reported success stories using Carbon Copy Cloner, which I believe works better for Leopard based systems. I leave it up to your judgement.
The ideal would be to have some external enclosure into which you could place your new SATA drive temporarily, duplicate everything into it and then you wouldn't need to reinstall anything once it is in place of the old hard disk. In reality I hadn't a SATA enclosure so I just backed everything up to that external hard disk. It takes a while, like 2 hours, to back up the whole disk (it was a 60GB disk). So you could play Metroid 3 in your wii meanwhile.
Apart from that I also copied my stuff (i.e. non System folders or Applications, just my data) to a different computer just to be safe :-)
Opening the case
Now comes the dirty stuff! This may hurt, mainly your psyche, since it looks like you're going to break your little precious mini. But if you're careful nothing wrong should happen.
Common sense advice: disconnect everything. Pretty obvious but there's always crazy people around there.
There's nothing you can do on the top side...
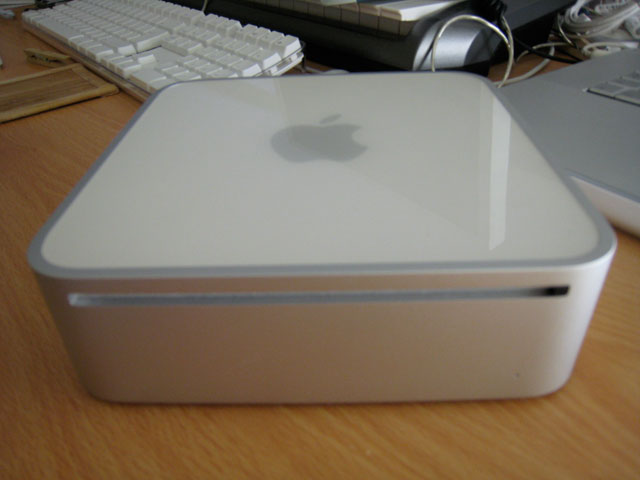
But maybe you could do something in the bottom...
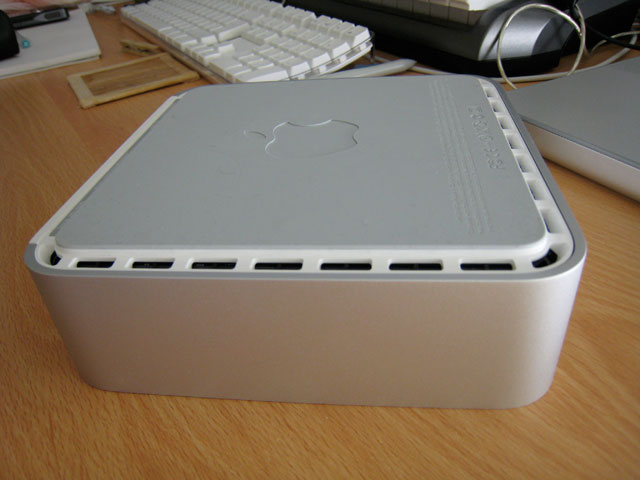
Pick up your scratching knife and even if it hurts your heart (it hurt mine) begin inserting it between the case and the white plastic area, and use it then for kindly inviting the plastic area to go out by levering it. This is what I mean:
It took me a bit of trying but if you place the knife in the right spots it will go out in just a minute. I guess if I did it everyday it could be out in 30 seconds. And that's the most difficult part of this process :-)
So here it is:
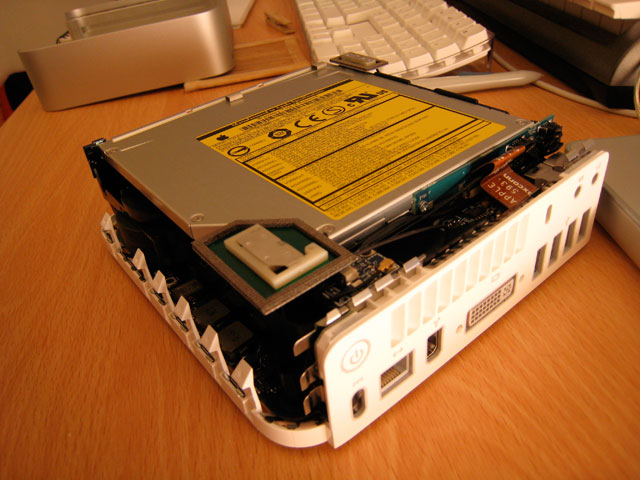
Unlike normal computers, here it's very difficult to spot components at first sight. Everything is so tightly packed that I didn't touch anything until I examined it carefully. And while you're on it, touch the metallic inside of the case so that you discharge all possible static electricity you could be carrying around. I have never heard of anything broken because of this but I do it just in case.
Unscrewing the right screws
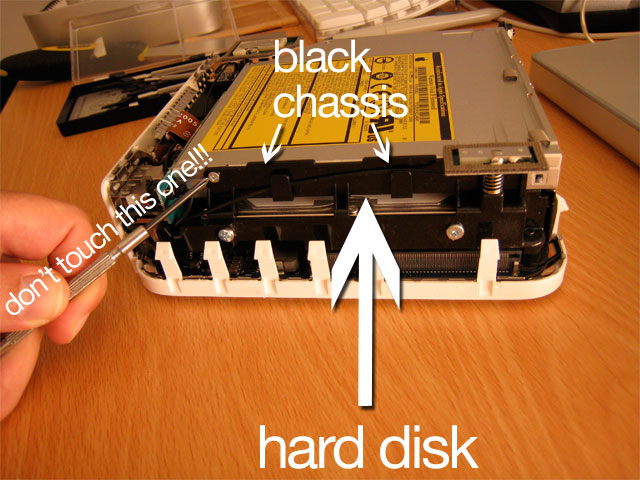
Here's where most of the tutorials fail. I was looking at three different tutorials in my powerbook but at the end I was so confused as to which screws did they refer to that I just decided to ignore them and began unscrewing things until I could reach the hard disk. It is underneath the dvd drive, and it is enclosed in that black chassis you can see. So we need to be able to loose the black chassis and then we'll be able to access the hard disk from the bottom.
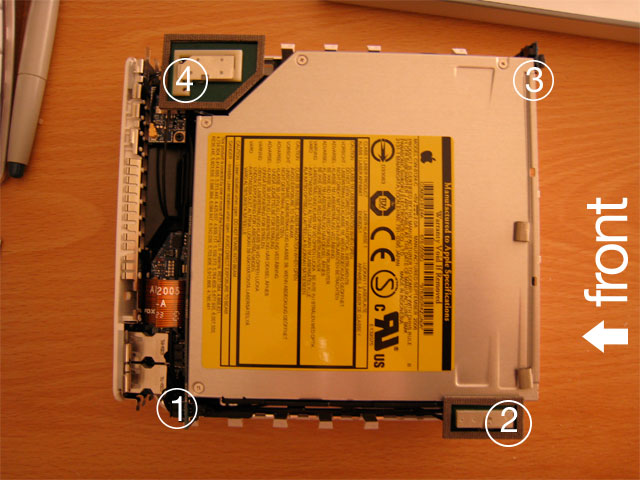
There are four screws we need to remove. There's one on each corner of the base, roughly saying (see pic). They are black and the one on front right is bigger:
Screw 1 is easy to get out.
Screw 2 was a little bit stuck on my case. I had to unscrew it very slowly or the screwdriver began to slip and didn't do any useful movement. It can be possible that the antenna (the Bluetooth one) is a little bit closer than it should be, but as it has a spring it is somehow flexible so don't worry too much if you touch it while unscrewing that one.
Screw 3 is easy as well, although quite deep (it's also the largest one).
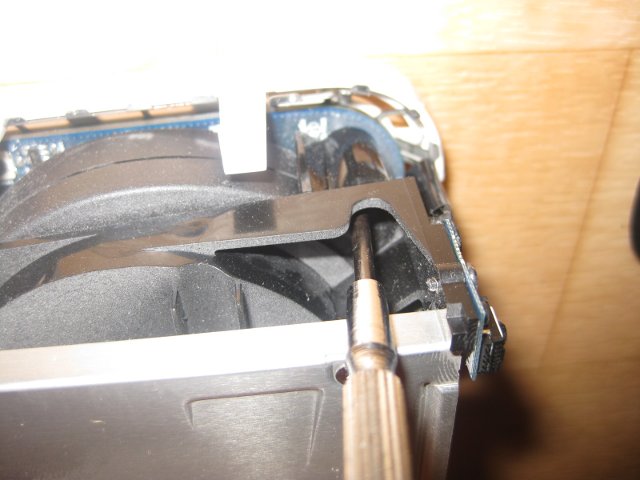
Screw 4 is relatively tricky. It is underneath that antenna (which is the Airport antenna, by the way) and it seems to be impossible to unscrew it without breaking the antenna! But the antenna can be removed by pressing the two tabs below it at the same time and it will pop out and leave way for you to unscrew the last one:
Michael Mustun kindly sent me the following five pictures in order to make even clearer which screws you need to remove. Danke, Michael! :)
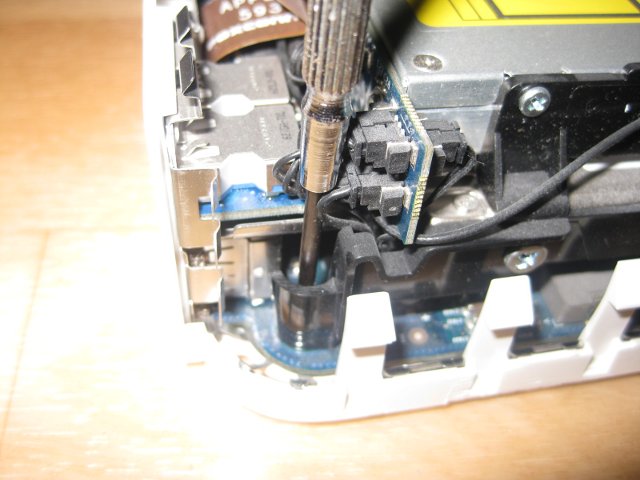
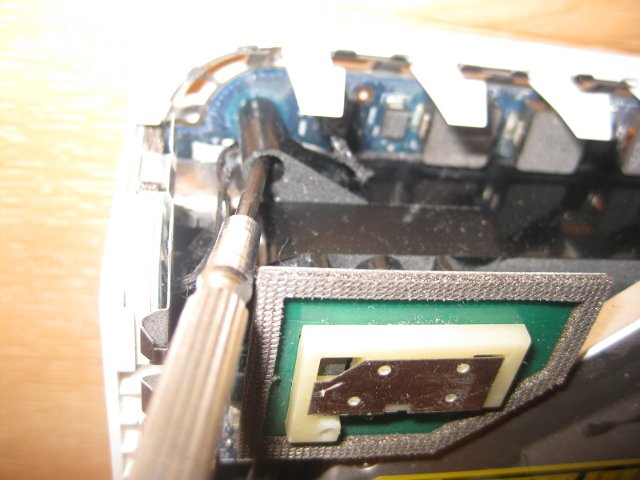
Battery wire
You need to disconnect a little jumper next to the battery before continuing. It is on the front side, right to the big button battery. If your thumb's fingernail is long enough you can use it for quickly and harmlessly disconnecting that little jumper. Just pull up with the nail and it will disconnect, without having to grab it from the wires:
Inside the mini (at last!)
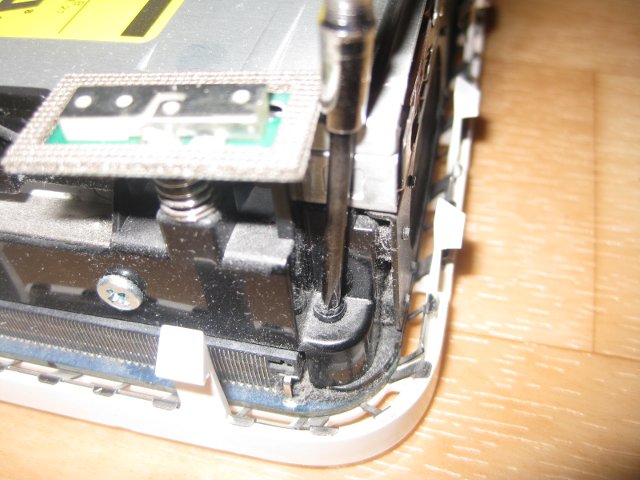
Once you've completed those steps it's a question of pulling apart the chassis from the base and carefully turn it so that you can see the inside. Be careful with the antenna you removed from its base while unscrewing the screw below it, it may get in the way (and you don't want to break it!).
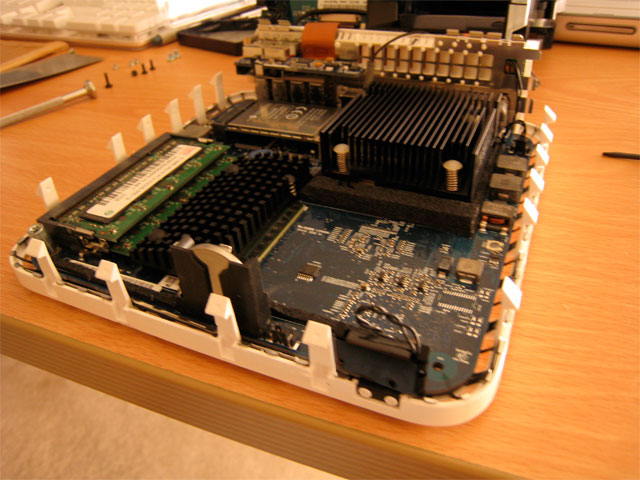
Here it is. If you want to upgrade your RAM it is now the right moment. Or the processor. I didn't want to do either so I just went for continuing with the hard disk stuff which is here:
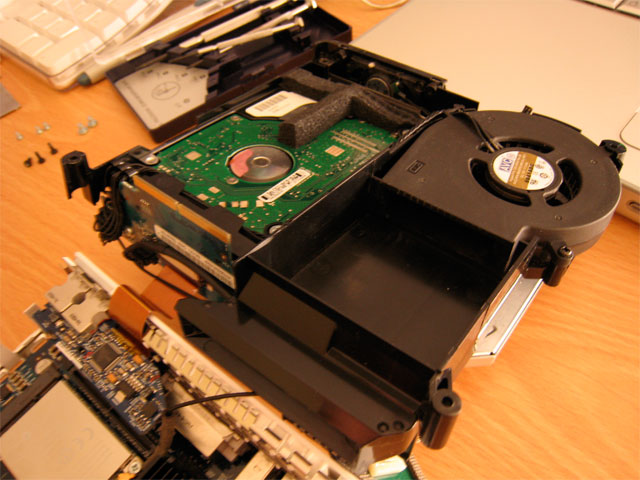
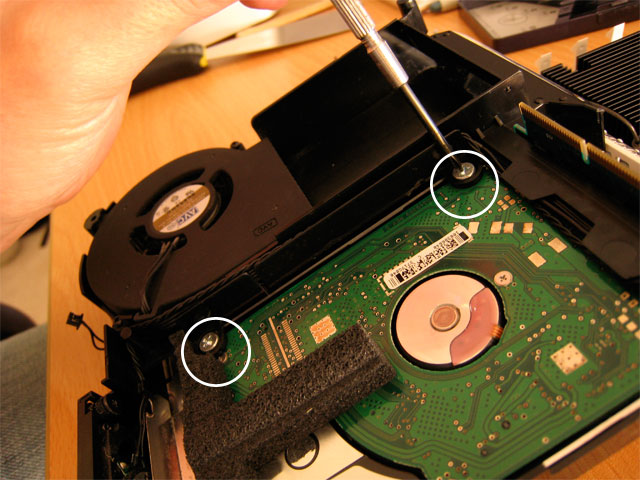
Removing the hard disk
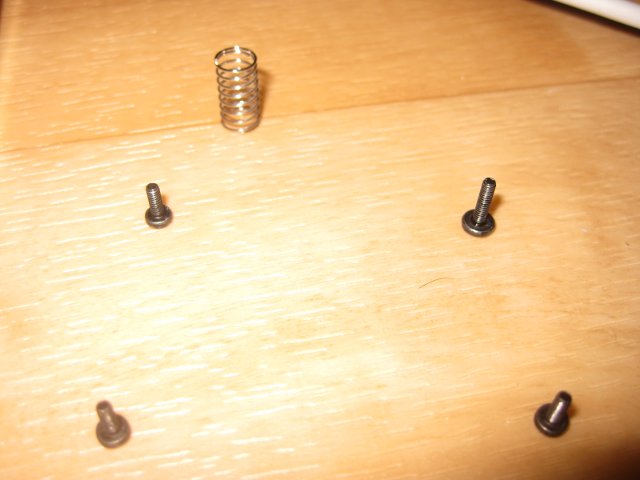
The disk is attached to the chassis with four screws. These are silvered and a little bit fatter than the ones we unscrewed. There are two screws on top of the disk and two more on the chassis side. They are easy to spot - no hidden secrets here.
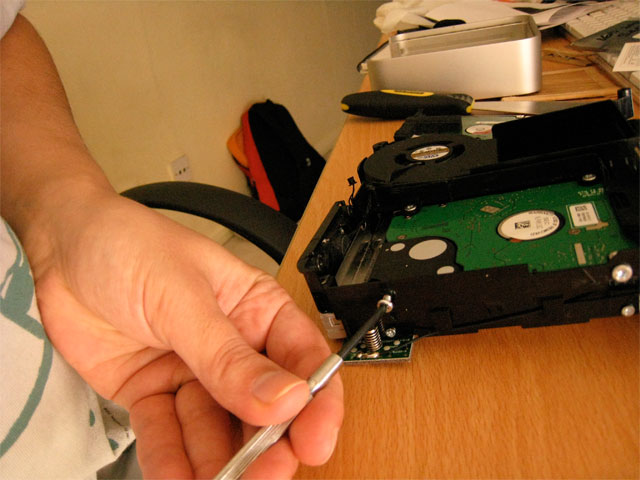
Once the screws are removed you need to pull backwards the disk to disconnect it from the chassis.
Now put there your new big hard disk. It may take a bit to connect it to the chassis but just be patient and you'll get it. No brute force required...!
Putting things back where they were
Once the new hard disk is in place the rest is way quicker. It just consists in undoing what you did, but just for the sake of completion:
Put the hard disk screws back
Carefully flip the chassis again and make sure the connection to the motherboard is fully done
It just needs a bit of pushing and you'll feel how it's connected. In any case there's not any other way of assembling this together and being able to close the case again, so you'll notice anyway :-)
Put the chassis screws back
Put the Bluetooth antenna back in its tabs
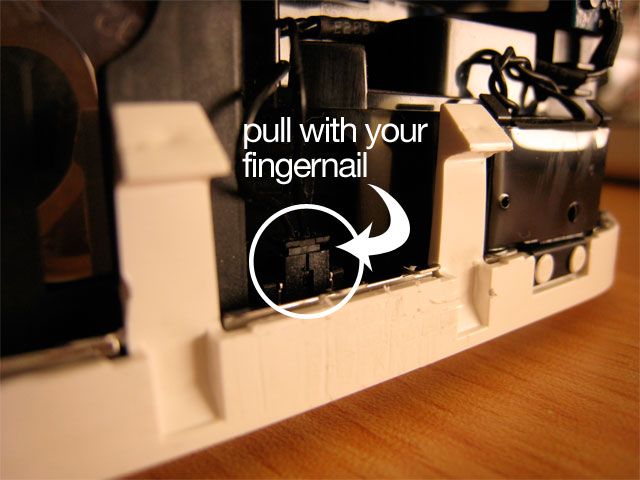
Connect the little battery wire we disconnected before
You could use your fingernail again for pushing it down and making sure it connects.
Testing it before closing the case
What I did for being safe - since it had the case opened and I didn't want to risk electrocution - was to disconnect the power adapter. Then I connected the screen, keyboard, mouse and power wires, the external USB disk with the clone of the old disk, and finally connected the power adapter to the mains again. Without touching any component from inside, I switched the computer on.

Because I had done a full clone of the hard disk, the computer could boot from the USB disk. Once it's booted, everything looks as if it was your normal disk: screen settings, applications, data - only it's not!
We need to restore the data from the external into the internal disk, but the internal is not showing because it hasn't been formatted. So go to the usual Applications - Utilities - Disk Utility and make sure the new internal disk is on the list of devices on left:
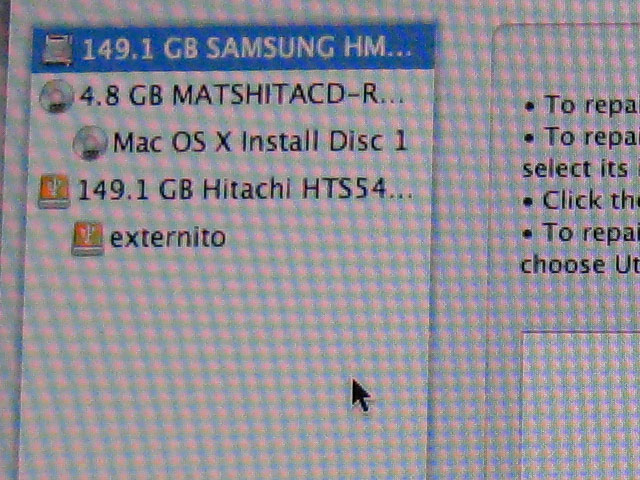
See how there's a Samsung disk with no partition (partitions are nested in the devices). I selected the new disk, clicked on the Erase tab and said I wanted a new partition, Macintosh Journaled type. Because it was way bigger than the old Macintosh HD partition, I called it MegaHD.
Then I selected MegaHD in the list of partitions and clicked on the Restore tab, dragged the external disk partition (externito) to the Source field and the MegaHD partition to the Destination field. And clicked Restore!

That will take quite a bit of time since it needs to read everything from the USB disk. You can have a walk or something while it completes. It took almost two hours here.
Once it's done, shut down the computer, disconnect the USB disk and try to boot up as normal (only with the case still open). It is normal for a folder with a question mark to appear the first time, it disappears after it finds the boot volume. Test your system, make sure everything keeps working, etc...
As it worked for me, I shut it down, put the case back and congratulated myself :-)
Now, as requested by a happy reader in the comments (hey cowboy!), I have added a paypal donation button. So if this tutorial was helpful and you want to say thanks the donation way, feel free to do so:
You can also FLATTR this tutorial if you've got a flattr account :-)
Or if you've got an Android phone, you might want to buy one of my apps in return.