Hardware tinkering, 2020+ edition
Hardware projects were the big thing in the JavaScript world a few years ago. In fact, even I was so excited about the idea that I somehow accumulated a shoe box worth of stuff: Arduinos, Raspberry Pis, components, cables, breadboards, you name it.
I also attended a couple of NodeBot events in London, which were absolutely amazing, but I did not have the time to persist in the learning. I was travelling lots for work, rarely home, and my brain was busy trying to figure out other problems.
It turns out in these recent times of pandemic and lockdowns (P&L), time at home has been an unexpected gift. You haven't seen much of it here because I just didn't have the energy to write, but I have not been twiddling my fingers...
Raspberry Pi 3
One of the first things I did was revitalising the Raspberry Pis and exploring how they behave. I realised that it is actually lots of fun, and it started with a very silly thing: flashing the operating system to the SD card.
In the past you had to download the operating system image to your computer, open the command line and start entering somewhat cryptic commands on it to save the image onto the SD card. Now, don't get me wrong, I love tinkering with the command line, but not for one-off things such as these that you do once or twice a year, because then I forget the specific syntax and have to relearn it again.
Nowadays the Raspberry Foundation offer a tiny little utility called Raspberry Pi Imager which will download the image you select, and save it onto the SD card with a few clicks. This little detail pleased me lots!

The other aspect that is really fun is that I do have a wired keyboard handy, but not a wired mouse. And that is not a problem: Raspberry OS is fully navigable with a keyboard only. So you can connect a freshly-flashed Raspberry PI to an HDMI monitor and be able to complete the setup and start using the device simply using a keyboard.
Also, while it looks quite polished, it is also quite positively... barebones. There are no superfluous frills and animations like you see in "modern" desktop environments. It is quite calming to work in this environment.
Another thing I like a lot is that it is quite easy to configure. In one of my experiments I tried connecting the Raspberry Pi to the TV to see how it would work there, but I quickly realised that the screen was cropped.
Fixing this was super easy; all it took was to edit a few values on a configuration file, reboot and it was done: the whole screen was visible (for the record, I get the same effect if I connect my laptop to the same TV; it definitely is an overscan-prone TV!).
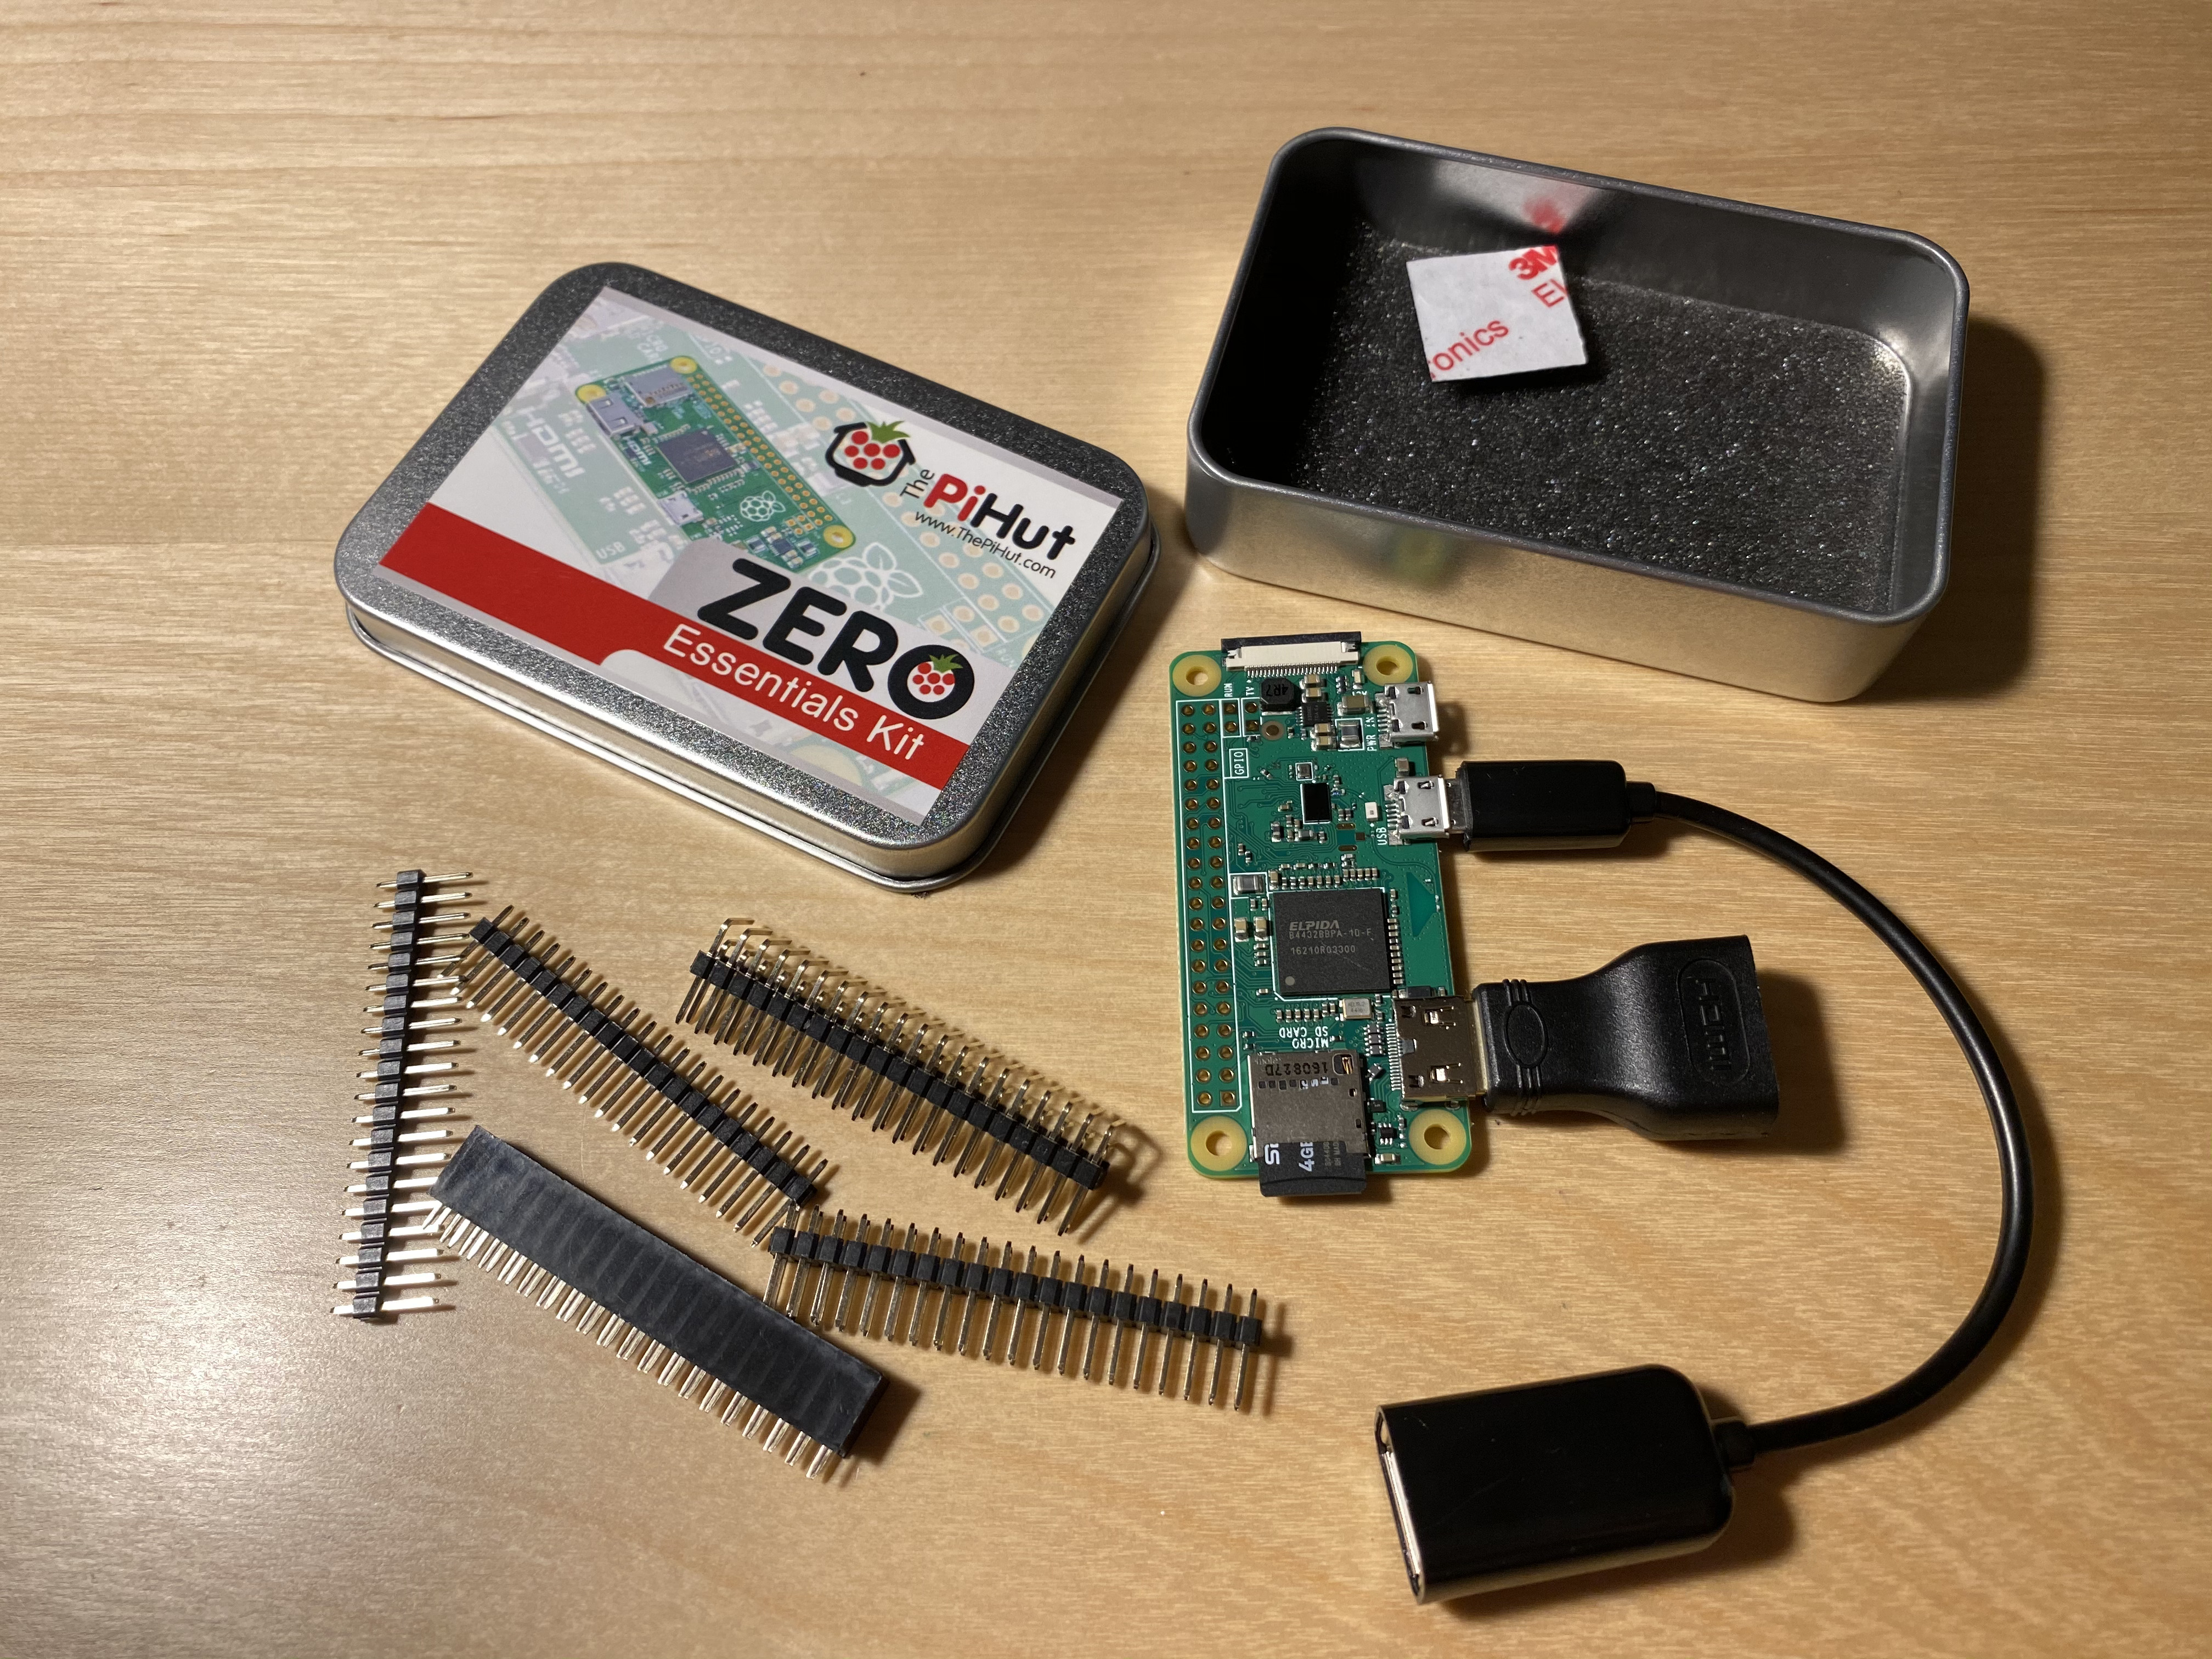
Raspberry Pi Zero Wireless
Once I got familiar with the workflow and environment, I installed a "barebones" (i.e. no desktop environment) version of the operating system on the Raspberry Zero Wireless. What could I do here? How fast was it?
I had acquired these two Zero Wireless devices with the idea of building some sort of non-mains connected device, thus using as little power as possible. Hence, no desktop needed, so we could save energy.
Sensing with the Raspberry Pi Zero
An idea started taking shape in my brain: I could build a "sensor station" of sorts, exposed via a web server, using the RPi.
And I had the sensors: a few thermistors, light sensors, you name it.
But I had a vague sense that this wasn't going to be as easy as it could be. A quick search confirmed my intuition: the Raspberry Pi only communicates with the outside world in digital terms. Or in other words, its GPIO ports are digital, not analogue. And the sensors I have are essentially resistors; their "output" is taken by reading voltage values, which are not digital at all.
I found there is a way that involves using capacitors to estimate how much current is going through the resistor. You're still accessing digital values (either HIGH or LOW), but you're also keeping track of time: how long does it take for the capacitor to reach the full state (and thus the pin reporting a HIGH value) depends on how much current is going through the resistor. I also had capacitors in my box, so I thought I was good to go.
But which software environment?
The next question was way more prosaic: which software environment should I program all of this in?
Most Raspberry Pi code and samples are written in Python. And I can read and write it, but I am not super comfortable with it. I am more used to writing JavaScript.
So I wondered: can I do this with JavaScript? It would make everything easier as I would not need to stop to search for syntax clarifications every step of the way. I could just focus on the fun part!
There are libraries such as onoff that interface with boards in JavaScript; the API is a bit more barebones than the classic Johnny Five project that gave momentum to the hardware in JavaScript craze.
I prioritised fun over purity again, and decided to go with Johnny Five. There are instructions for using it with Raspberry Pi, and although it's a bit convoluted to get the node system set up, I finally got it working.
Yay...?
Nay—this is where I started seeing my hardware limitations.
To solder or not to solder...
If I want to connect components to the Raspberry Zero, I need to use its GPIO ports.
But... the headers are not there, because the premise of the Zero is that it is barebones and you add what you need to it.
Now, I have some components from the Zero starter kit that I also acquired when I bought the Zero:
But I realised then that the headers do not stay put in place when you plug them into the Pi. They need to be soldered to the board!
At this point, I decided to "draw a line in the sand": I have never soldered, and I do not have intention to get into that any time soon.
What else could I do to access sensors without buying a soldering iron? Was there anything in my shoe box that could help me?
The curtain opens, and an Arduino appears
I have a love-hate relationship with Arduino.
I love the system. It's fun, it's easy, it's predictable.
Granted, I have not really used it in production, but it is good enough for a hobbyist, and frequently feels even more reliable than most computer operating systems.
On the other hand, all the politics around the board, the trademarks, and the governance have been quite dirty and weird. To get an idea of the amount of bickering and drama that I'm talking about, you can look at the story of Arduino and Arduino vs Arduino.
Things seem to have stabilised nowadays, but it still feels like if you use an Arduino you are agreeing with those practices, and it makes me uneasy.
And yet I had these boards here in front of me, and there is no point in throwing them away and going to waste, is there?
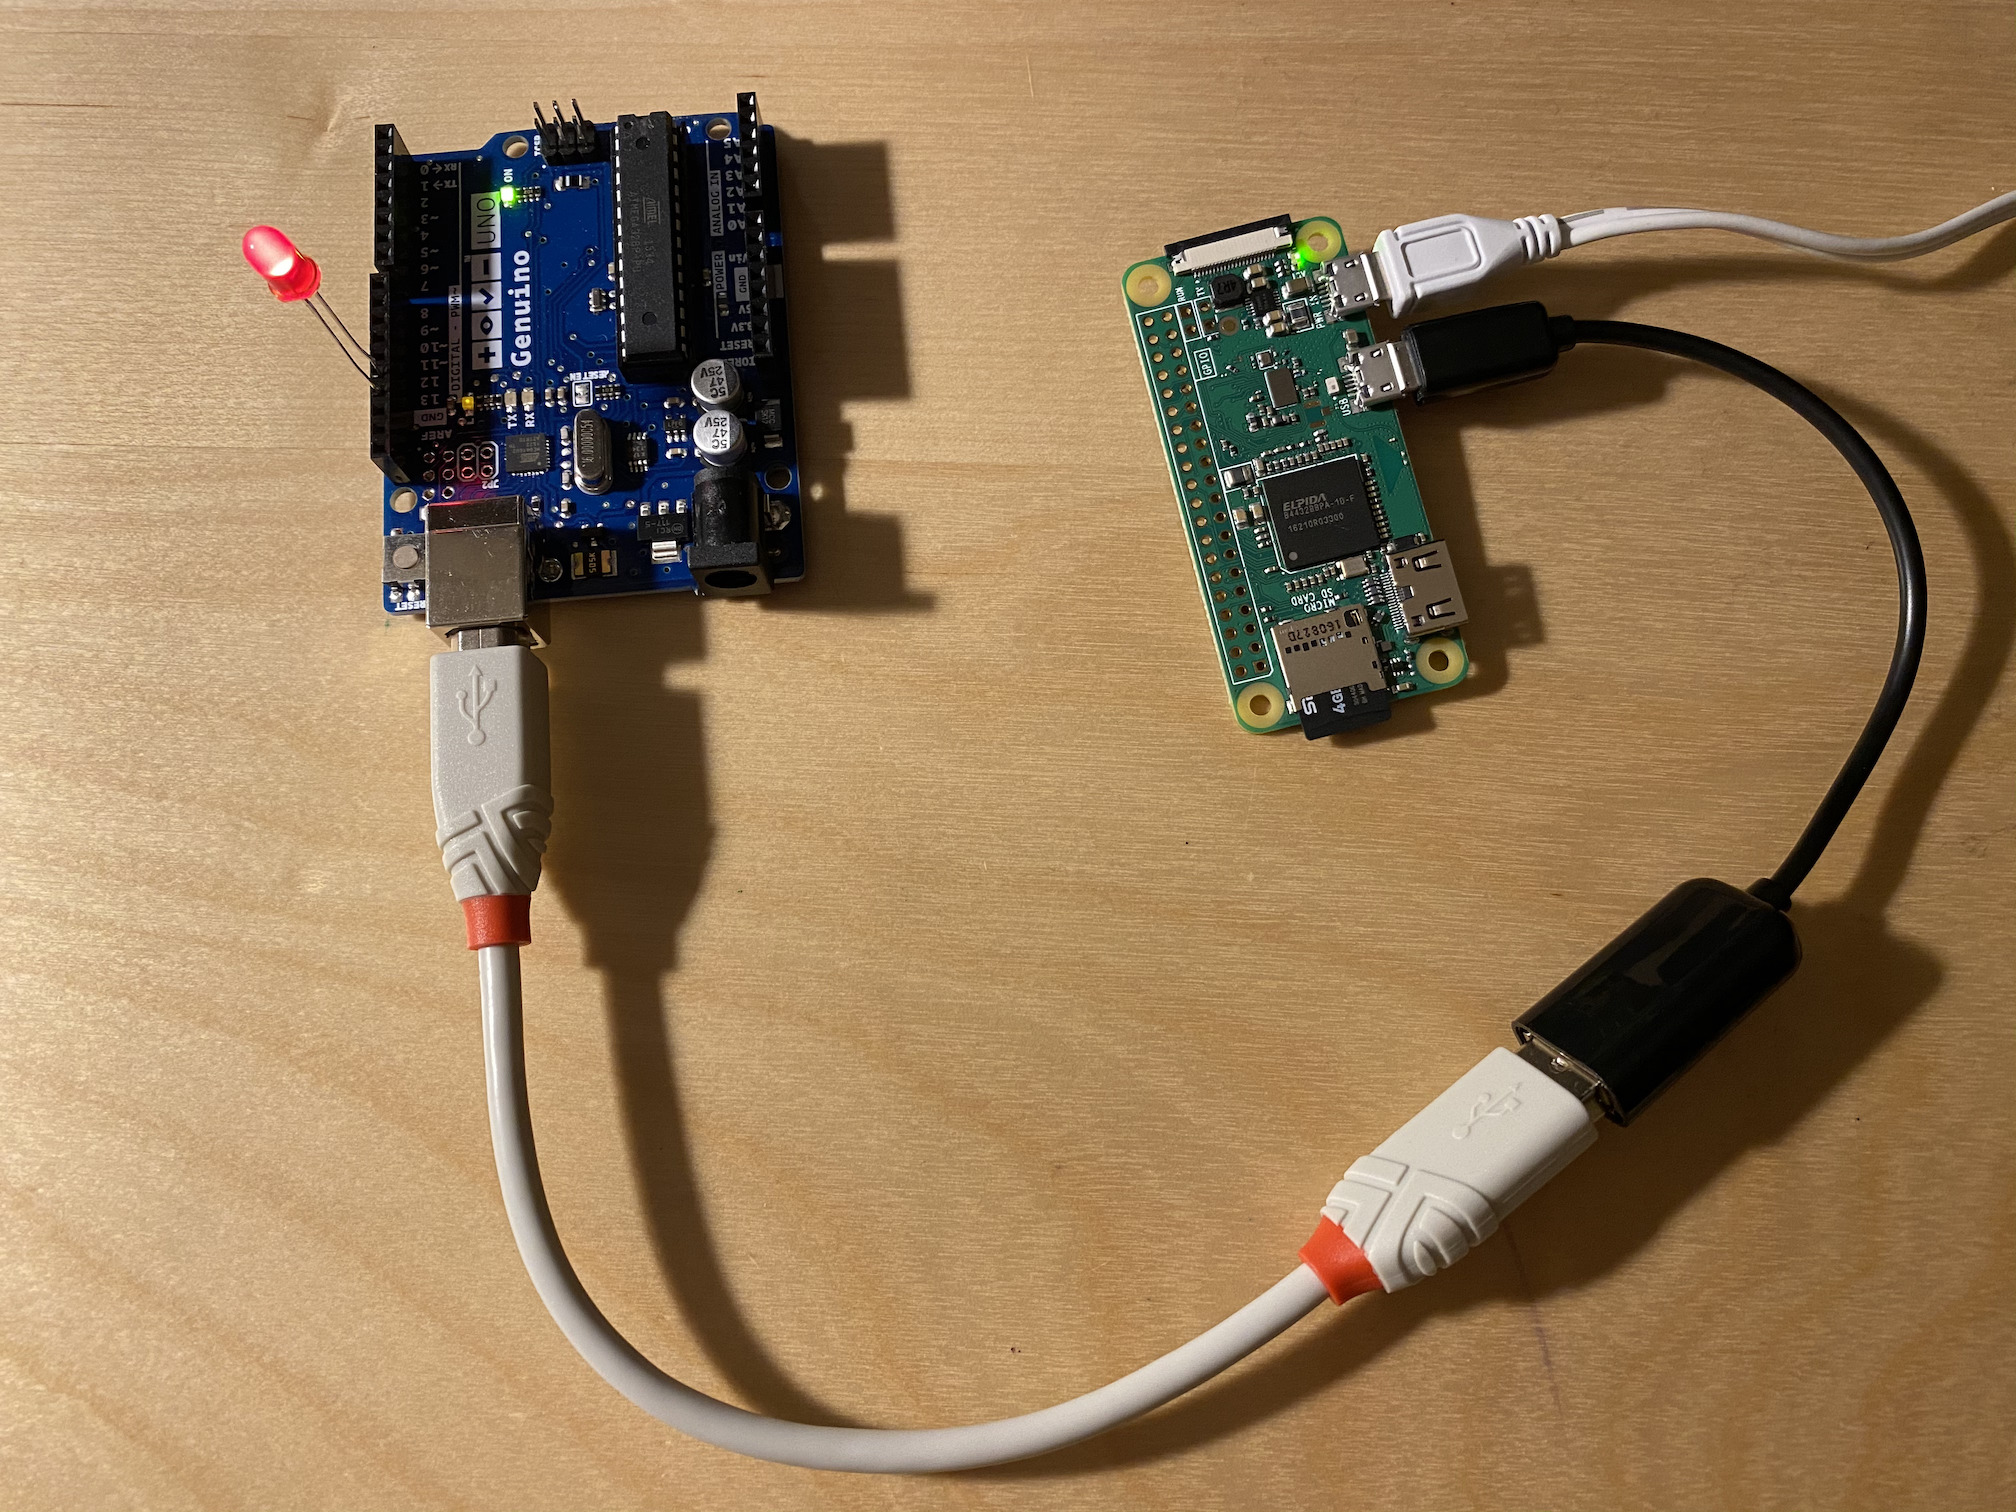
So I connected an Arduino Uno to my laptop. I had no idea of what was flashed in there. It's not like a Raspbi that you can connect to a screen and see what's up in that system: unless you reconstruct the exact circuit in your breadboard and connect it to the right pins in the Arduino board, there's no way you can find out what was it intending to do.
Funnily, the last thing I remember doing was a very rudimentary room temperature reading system. It would read from the thermistor, print the temperature and sleep for 500 ms. Repeat.
The Arduino IDE that I had in my laptop had been installed in 2015, and it was not working anymore (I presume subsequent updates of the OS have "something" to do with it). The Arduino website strongly pushes you towards using a Web version of the IDE, which... I'm not keen to do. I started searching: did they really stop distributing the laptop-executable version of the IDE? What about people who do not have access to the Internet? What is this? AAAAGH!
I found there's a CLI version of the Arduino environment. I installed it with Homebrew, and started learning about how to use it to flash things onto my board.
brew install arduino-cli
I eventually managed to flash a simple "blink the LED" sketch:
void setup() {
  // initialize digital pin LED_BUILTIN as an output.
  pinMode(LED_BUILTIN, OUTPUT);
}

// the loop function runs over and over again forever
void loop() {
  digitalWrite(LED_BUILTIN, HIGH);   // turn the LED on (HIGH is the voltage level)
  delay(1000);                       // wait for a second
  digitalWrite(LED_BUILTIN, LOW);    // turn the LED off by making the voltage LOW
  delay(1000);                       // wait for a second
}
Some SUCCESS at last!
(if you have access to the Arduino IDE you can find the blink example there too: File... Examples... 01. Basics... Blink).
However for using Johhny Five I needed to flash the StandardFirmata program (which provides a sort of standardised way to access devices without having to reprogram them so frequently, as you do more work on the connected computer), and I wasn't sure where to find it.
I ended up realising you can install the IDE... using Homebrew again!
brew install arduino
With this I could find the Standard Firmata sketch: File... Examples... Firmata... StandardFirmata) and flash it onto the board. I tested it worked by running the same blink code, but written in JavaScript:
const Five = require("johnny-five");
const board = new Five.Board();

board.on("ready", () => {
    const led = new Five.Led(13);
    led.blink(500);
});
It of course takes longer to get it up and running, and you can see that more things are happening as evidenced by the TX / RX LEDs flashing on the Arduino. But the end result is the same.
The beauty of this set up is that I can develop stuff on my laptop (which runs things such as johnny five and the web server, faster) and then just periodically test the hardware aspects and the whole end to end thing work on the Raspberry PI connected to the Arduino (so I essentially replace my laptop with the Raspberry Pi).
I can also log into the Raspberry Pi remotely with ssh, pull code from the Git repository onto the RPi, and initiate the test, which is neat:
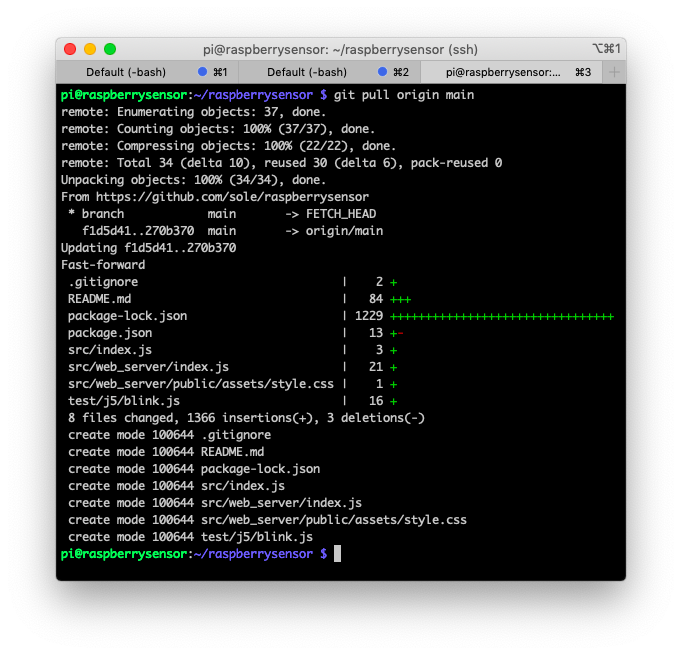
Things are really slower on the Raspberry Zero (specially compiling binary node dependencies). Which confirms that my plan of iterating quickly on the laptop is a good idea!
Finally, here's the Raspberry Pi running the same blink test via Johhny Five - initiated from my laptop via ssh:
(by the way, one of my favourite things is that enabling ssh access in the Raspberry Pi is as simple as creating an empty file called ssh on the root of the filesystem and rebooting).
Now that the set up has been established and I can interface with the outside world and also have enough computing power to record things and offer them via a web server, I'm ready!
And here's the repo if you want to follow along: https://github.com/sole/raspberrysensor
Note: this post has been lingering on my drafts for the longest time. I finally got energy to finish it, but yes, the last commit at the time of publishing was November. And I owe you nothing 😝